
WAI Docs Wed Aug 19 13:22:37 EDT 2026
List
Quick Start
Quick Start
User Guide
User Guide
Policies - GuardRails
Policies - GuardRails
Witness Anywhere: Remote Device Security
Witness Anywhere: Remote Device Security
Witness Attack
Witness Attack
Administrator Guide
Administrator Guide
404
404
Microsoft Entra ID (Azure AD) Integration
Provide the account team with the IT Admin’s email address. An invitation will be sent to setup the Entra ID integration.
The email will come from onboarding_idp@witness.ai.
Note: Entra ID SCIM integration is required for Witness Anywhere deployments. See the “SCIM Integration” section in this page below.
Once the IT Administrator receives the email to integrate Entra ID (Azure AD), click the link and select Entra ID (Azure AD)

Create Enterprise Application
- Select Enterprise applications from your Entra ID dashboard.
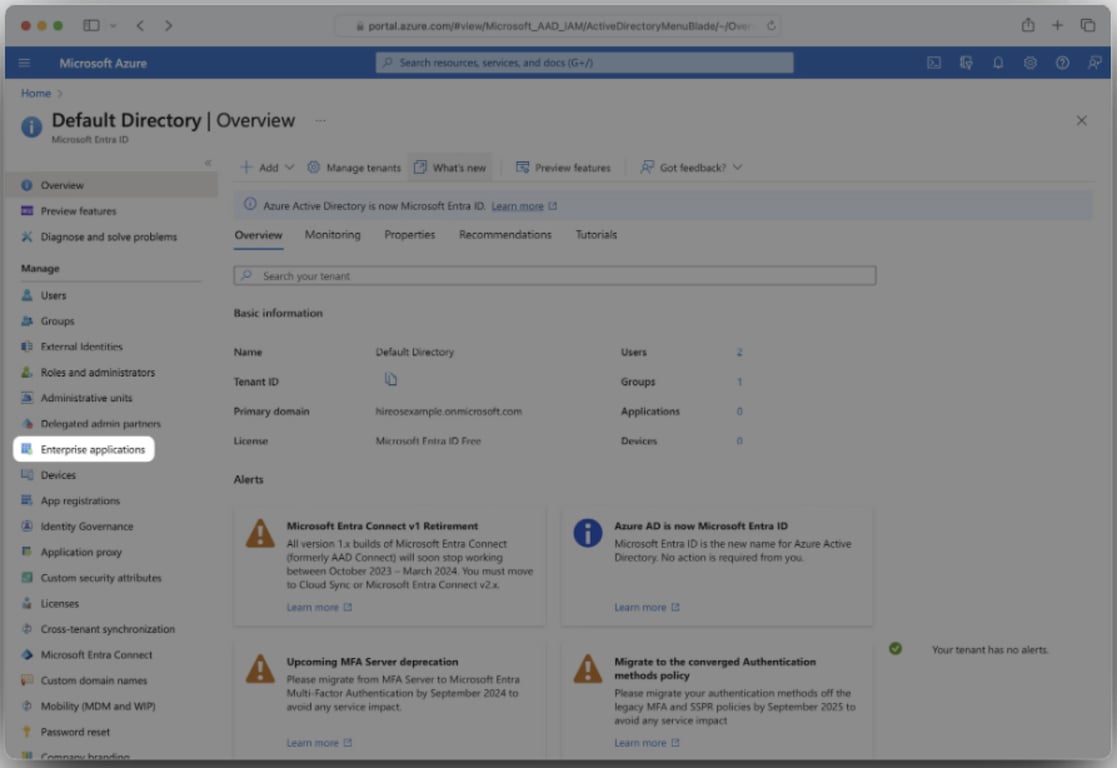
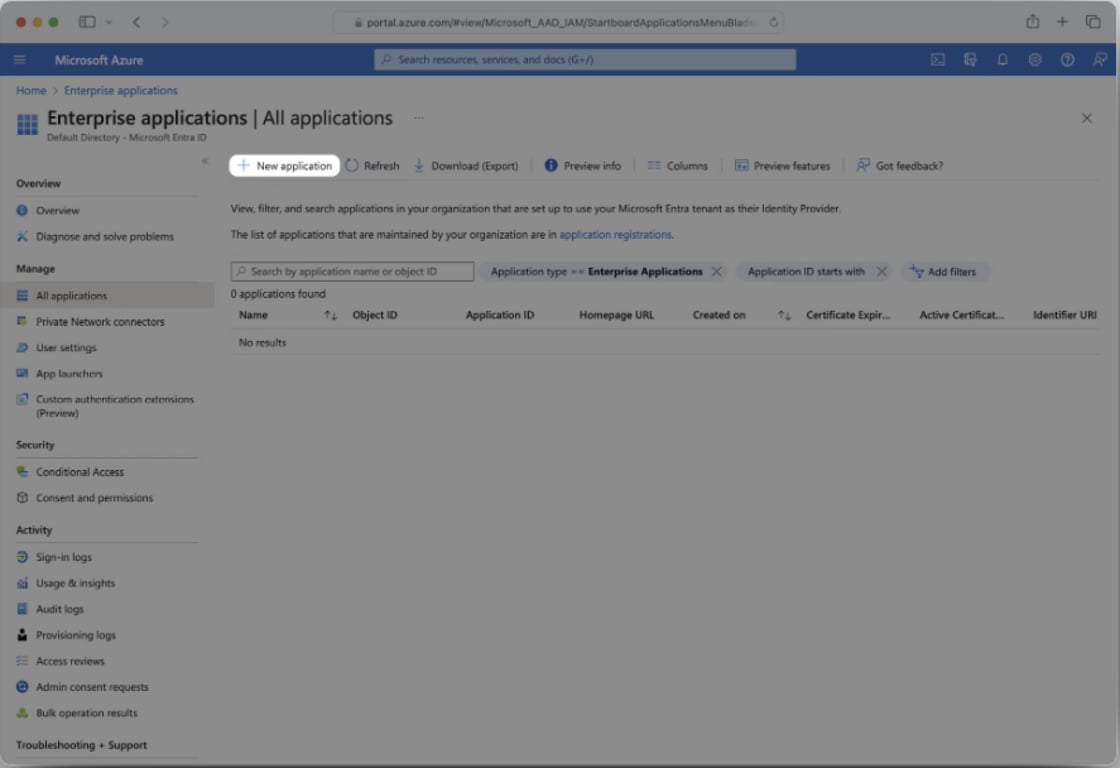
- Click New application and continue.
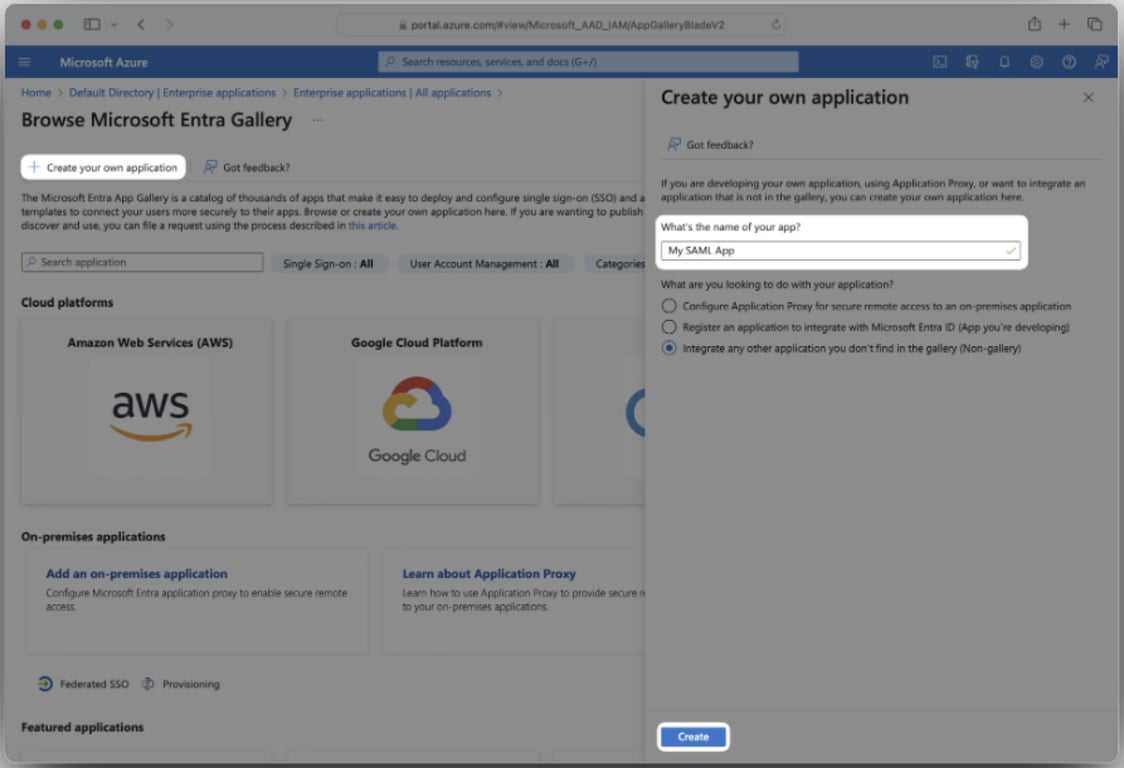
- Select Create your own application, then enter an App name that describes WitnessAI. Under What are you looking to do with your application?, select Integrate any other application you don’t find in the gallery (Non-gallery), then click Create.
- Next, select Single Sign-On from the Manage section in the left sidebar navigation menu, and then SAML.
Continue with Basic SAML Configuration
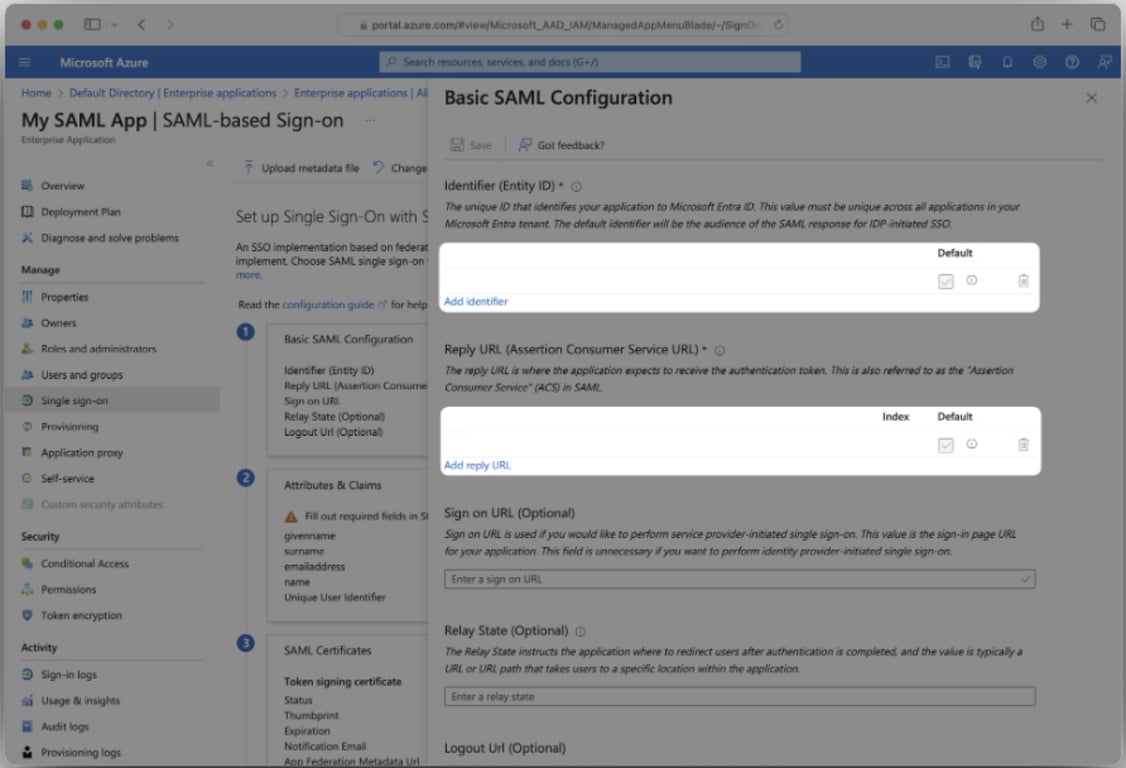
Basic SAML Configuration
- Click the Edit icon in the top right of the first step
- Copy this Identifier - replace customURI with your company’s URI.
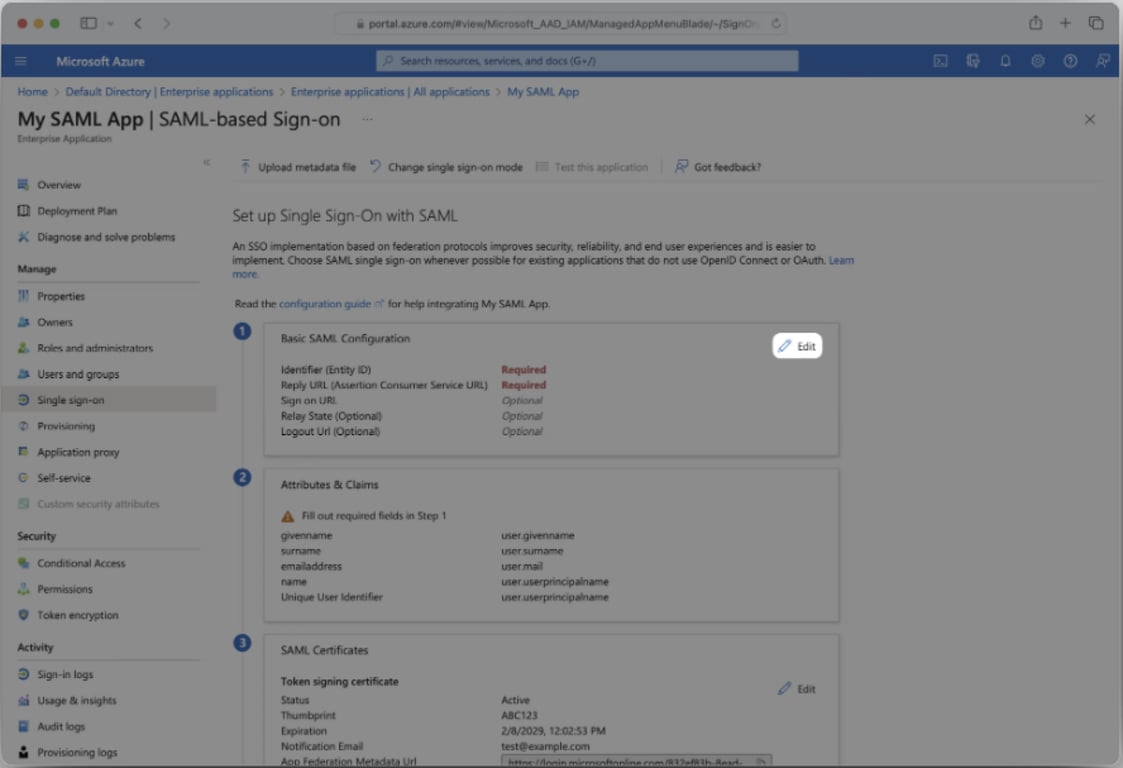

b. Copy this Reply URL - replace customURI with your company’s URI.

- Submit the Identifier and the Reply URL in the Basic SAML Configuration.
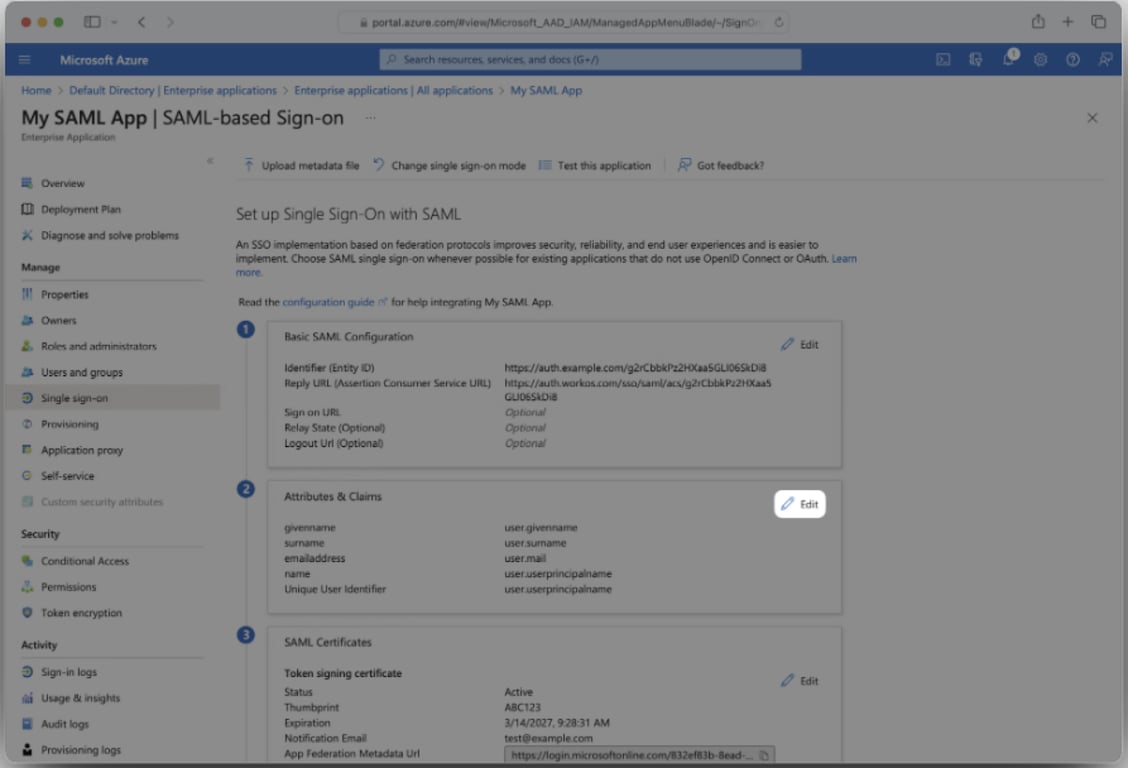
User Attributes & Claims
- Click the Edit icon in the top right of the second step.
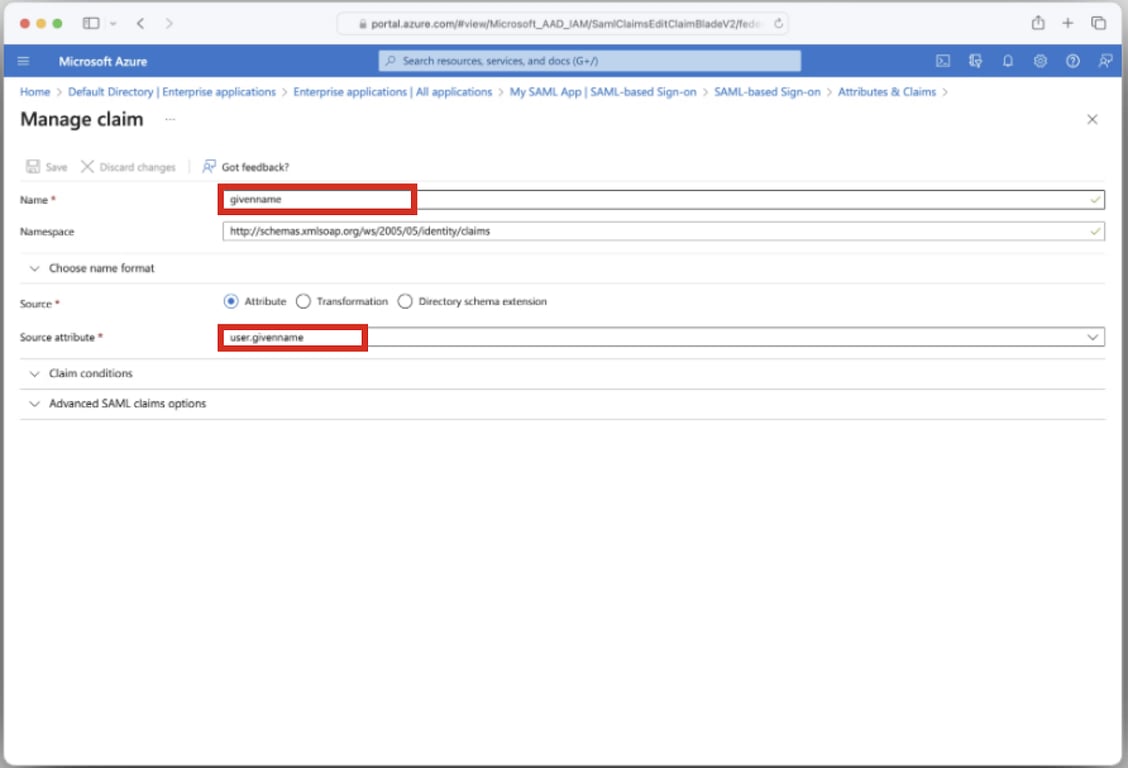
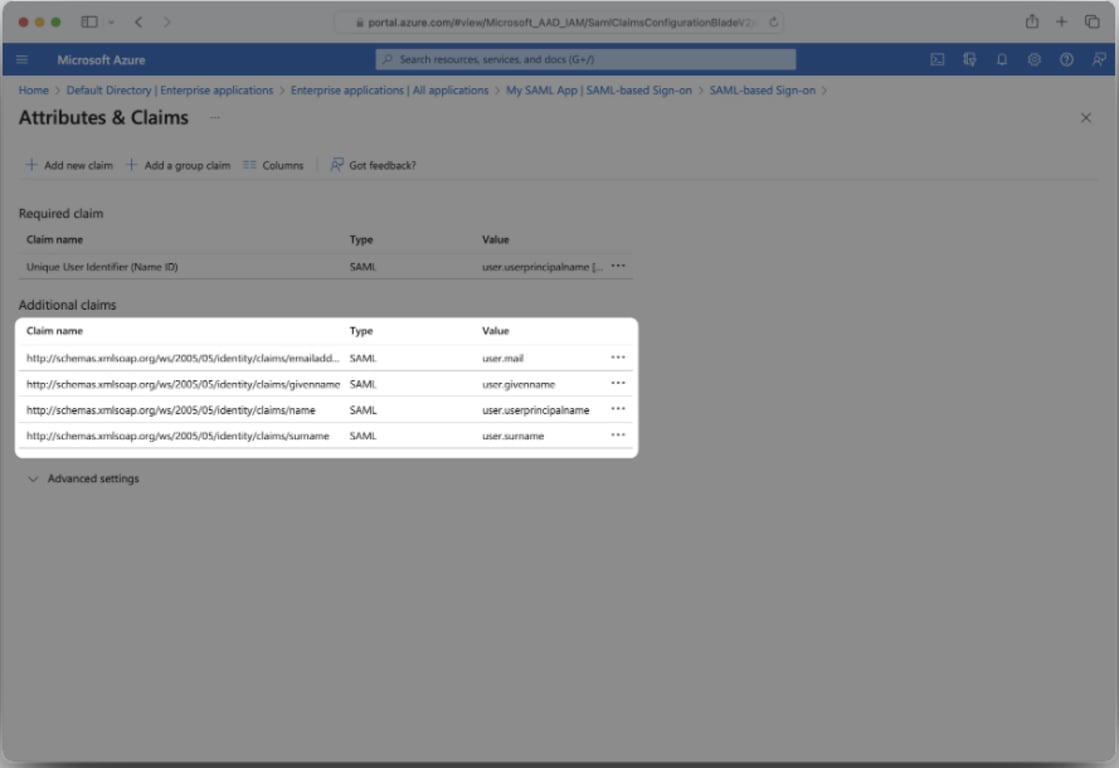
- Fill in the following Attribute Statements by entering the claim name in the Name field and the value in the Source attribute field.
Select Next:

Below is an example of how to format your claim within the Azure claim editor.
Make sure the "Namespace" value ends in `/claims`
Assign People & Groups
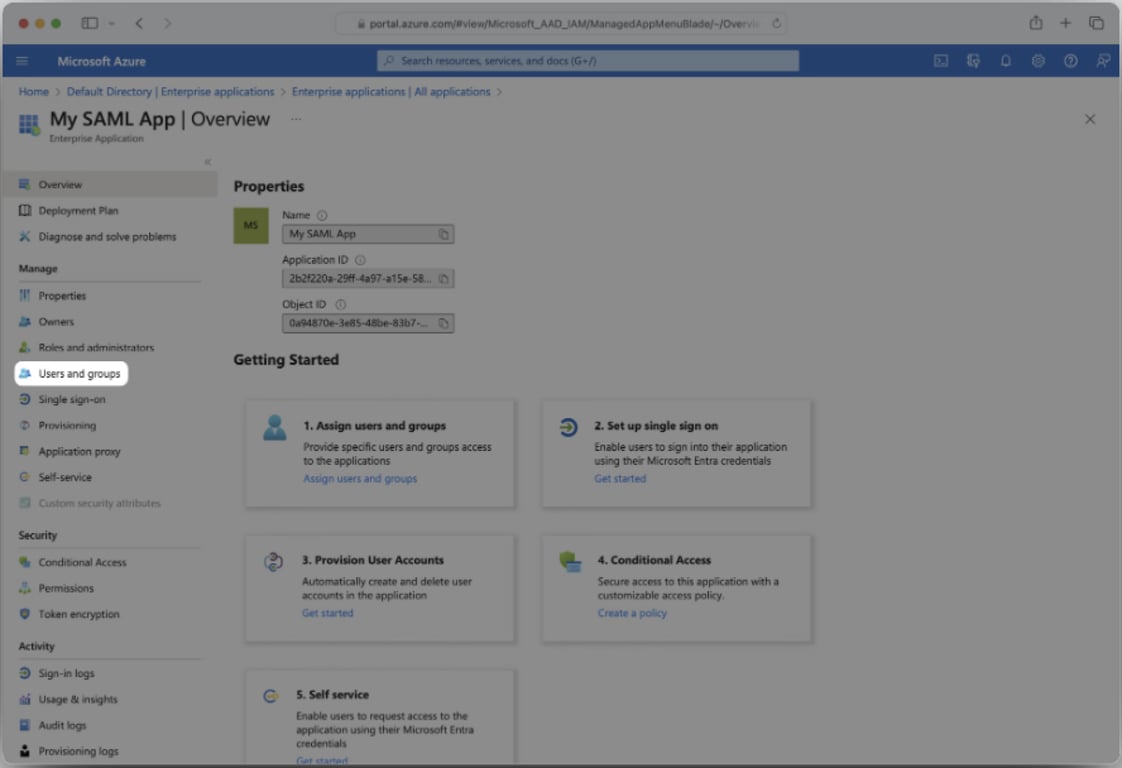
- In order for your users and groups of users to be synced to WitnessAI you will need to assign them to your Entra ID SAML Application. Select Users and groups from the Manage section of the navigation menu.
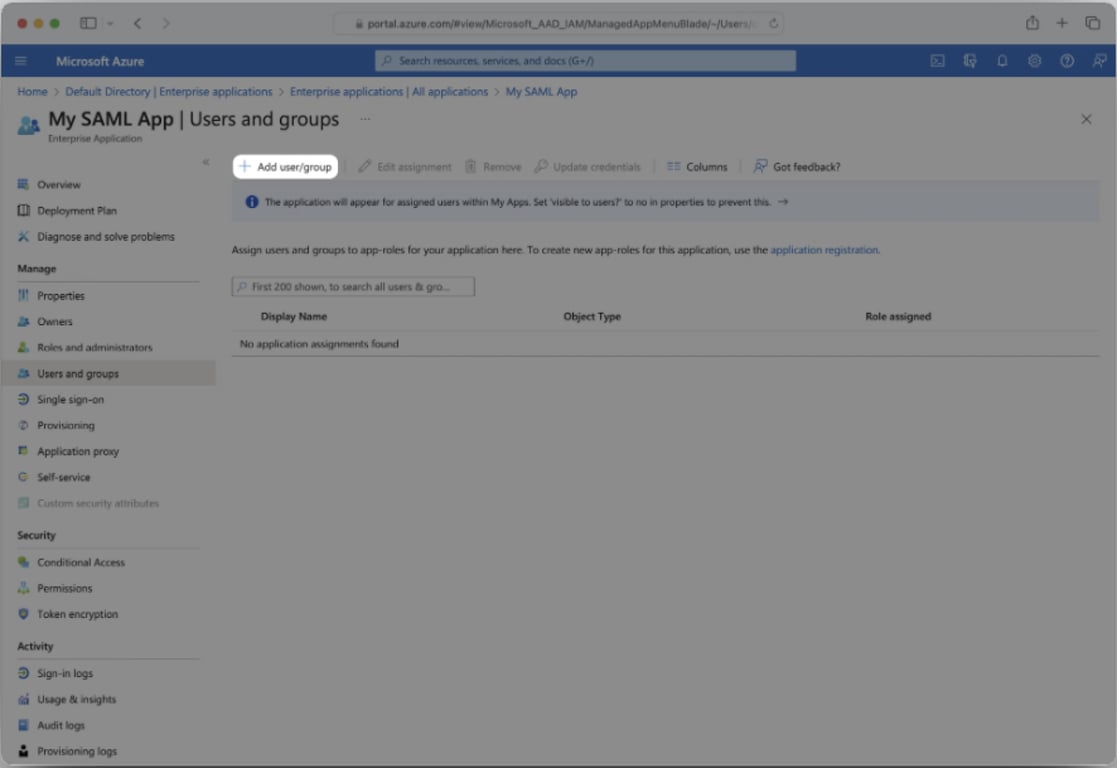
- Select Add user/group from the top menu.
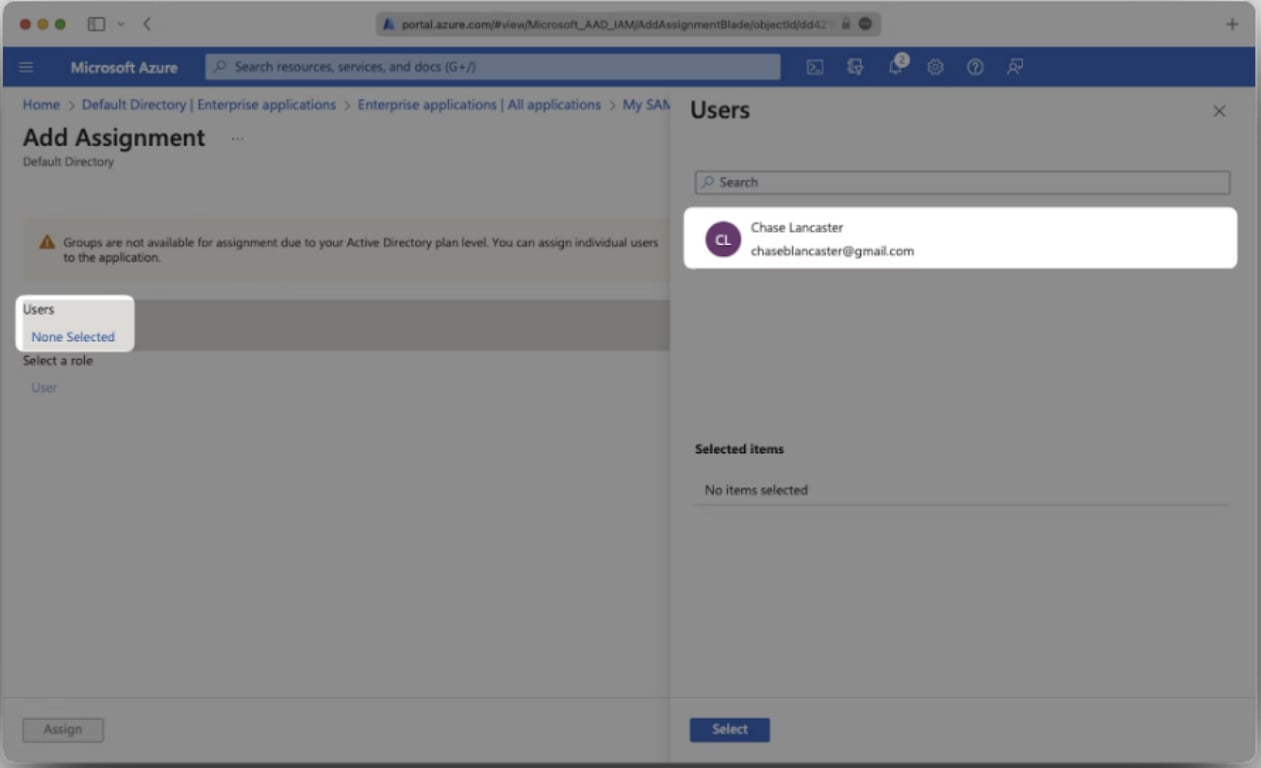
- Select None selected under the Users and Groups. In the menu, select the users and groups of users that you want to add to the SAML application, and click Select.
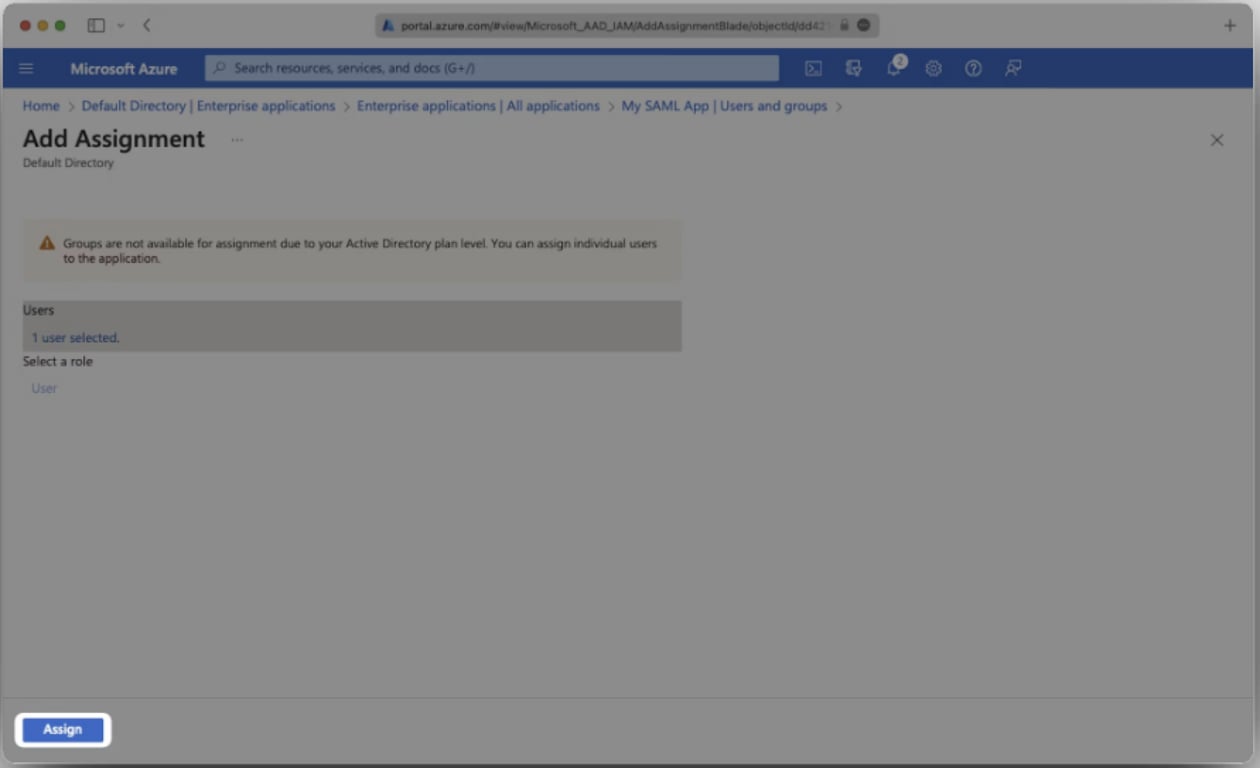
- Select Assign to add the selected users and groups of users to your SAML application.
Upload IdP Metadata
- Navigate down to Section 3 of the Single Sign-On page, to SAML Signing Certificate.
Copy the URL provided in App Federation Metadata URL.
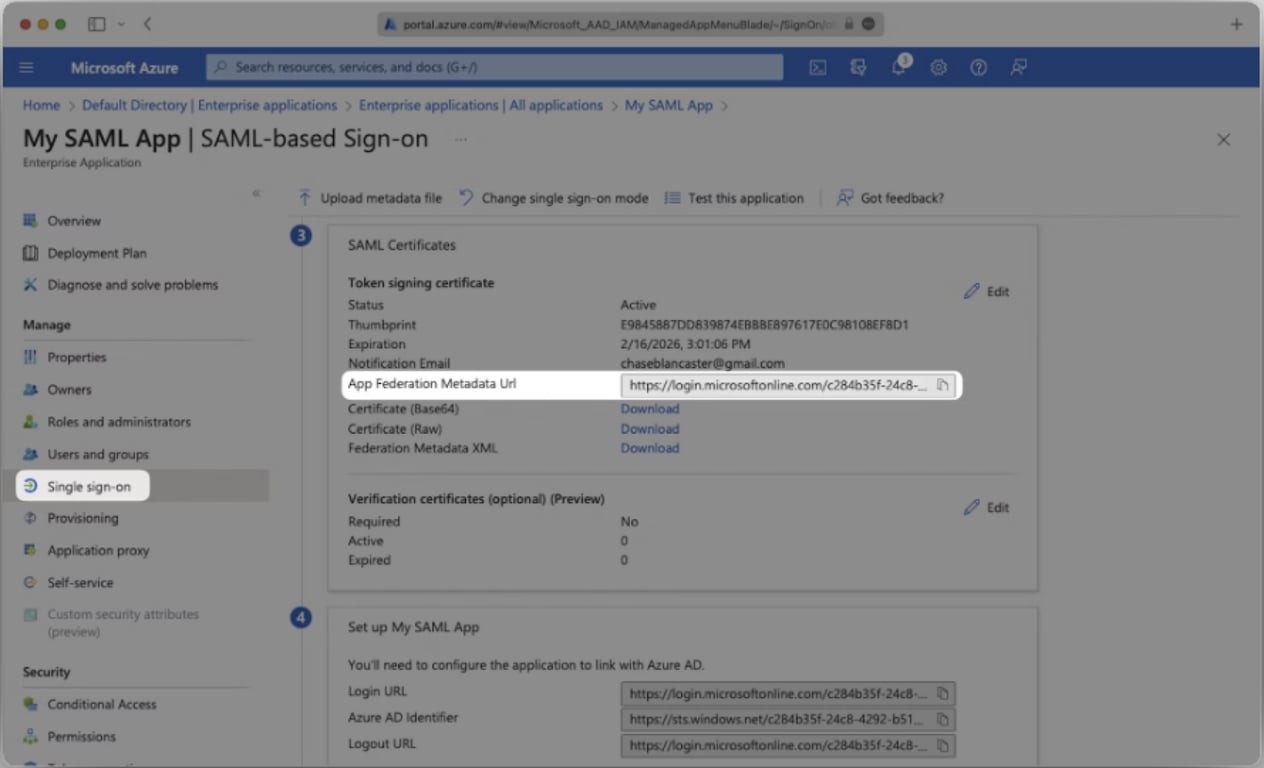
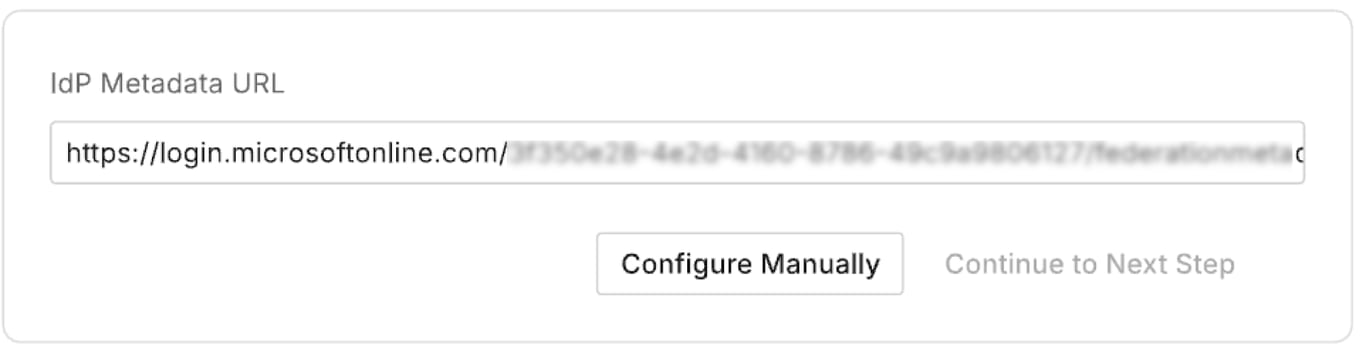
- Provide the Metadata URL you copied into the prompt as shown below:
Test Single Sign-On
To activate Single Sign-On and verify that it was configured correctly you will need to perform a test sign-in with your identity provider

SCIM Integration
Notes: Entra ID SCIM integration is required for Witness Anywhere deployments.
The SCIM API Tenant URL and Secret Token will be provided by the WitnessAI Account Team.
Add SCIM Provisioning
From your Microsoft Entra ID dashboard, navigate to Enterprise applications and select the WitnessAI application from the list.

Click Provisioning under the Manage section of the WitnessAI application.

Click Connect your application to begin configuring SCIM provisioning.

Edit & Test SCIM Connection
Enter the Tenant URL and Secret Token provided by the WitnessAI Account Team, then click Test connection. Once the connection is successfully validated, click Create to proceed.

Return to the WitnessAI Enterprise Application, click the Provisioning tab, expand the Mappings section, and select Provision Microsoft Entra ID Users.

Under Attribute Mappings, ensure that the userName attribute is mapped to the Entra ID attribute that contains the device username. Click Save after updating the attribute mappings.
Example: If the username on the device for the user john.doe@company.com is emp123, john, or john.doe, make sure the userName attribute is mapped to the Entra ID attribute that holds this corresponding value.

Note: You can identify the value of specific attributes by opening a user account in the Entra ID portal and clicking on Properties.
Return to the WitnessAI Enterprise Application, navigate to the Provisioning tab, set the Provisioning Status to On, and click Save.

Please allow up to one hour for the changes to sync from Entra ID to WitnessAI.